
aka “Why does this thing keep giving me a 400 error?”
If you’ve ever tried to set up the OAuth flow between Salesforce and Square’s Sandbox, you’ve probably gone down the same rabbit hole I did — full of documentation that kind of hints at the answer but never quite gives you the full map.
Well, after way too much trial and error (and a fair bit of talking to my screen), here’s the step-by-step guide I wish existed when I started.
Prerequisites: Do These First
Before we jump in, make sure you’ve got the boring-but-necessary parts ready:
✅ You’ve set up a Named Credential in Salesforce with an Auth Provider for Square.
✅ Your Square Developer App has:
- The correct Sandbox credentials (Client ID/Secret).
- A Redirect URL that matches your Salesforce setup.
✅ You’re mentally prepared to debug a 400 error.
The Sandbox Gotcha No One Tells You About
So you try the OAuth flow. You click “Authenticate”, see the Square login screen pop up… and BAM 💥 — Developer Console shows a status 400.
You double-check the URL, the client ID, the scopes — everything looks fine. But it’s not working.
Here’s the kicker from Square’s docs (that you probably skimmed like I did):
“When testing the OAuth flow in the Sandbox, you cannot sign in directly to the Square authorization page like you can in the production environment.”
Wait… what?
Yup. In the Sandbox, Square doesn’t behave like a real login. Instead, you have to simulate a logged-in test user — and this step is very not obvious.


🪄 The Secret Sauce: Sandbox Dashboard Magic
Here’s what you actually need to do:
Step 1: Go to the Square Developer Console
👉 developer.squareup.com/console/en/apps
Step 2: Choose Your App and Open a Test Account
- Click into your app.
- Head to the Sandbox Test Accounts section.
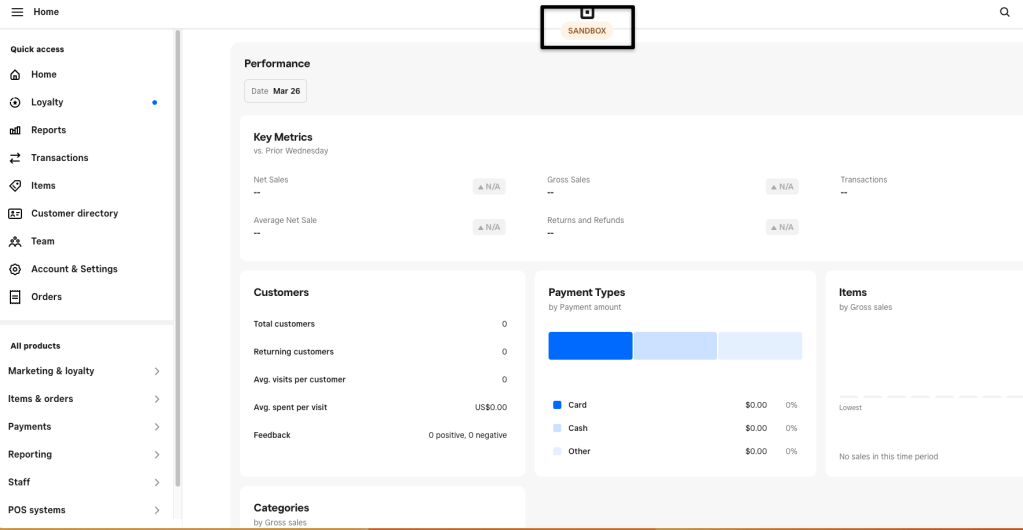
- Click Open on one of the accounts to launch the Sandbox Square Dashboard.
⚠️ Important: Keep that window open! This acts like your test user is “logged in”.
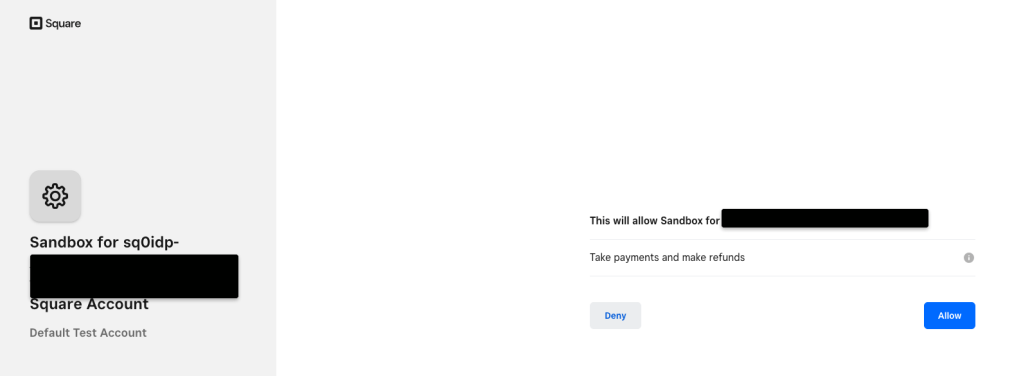
Step 3: Back to Salesforce — Try Authenticating Again
With the Sandbox Dashboard open, retry the OAuth flow in Salesforce.
Step 4: 🎉 It Works!
No more 400 errors. You should now be redirected back to Salesforce with the OAuth token and all the good stuff.
Going through documentation : https://developer.squareup.com/docs/oauth-api/overview
Sandbox testing
When testing the OAuth flow in the Sandbox, you cannot sign in directly to the Square authorization page like you can in the production environment.
Instead, you must open the Sandbox Square Dashboard for a Sandbox test account in a separate web page and then use the authorization URL to open the Square authorization page.
But there is this “Sandbox Square Dashboard”?
Going through yet another documentation : https://developer.squareup.com/docs/devtools/sandbox/overview#open-the-sandbox-square-dashboard
Step 1 : Go to your square developer console (developer.squareup.com/console/en/apps

Step 2 : Select the Sandbox test accounts

Step 3 : Open the Square Dashboard and keep that page open. Now refresh the Authenticate page.
Step 4 : Voila
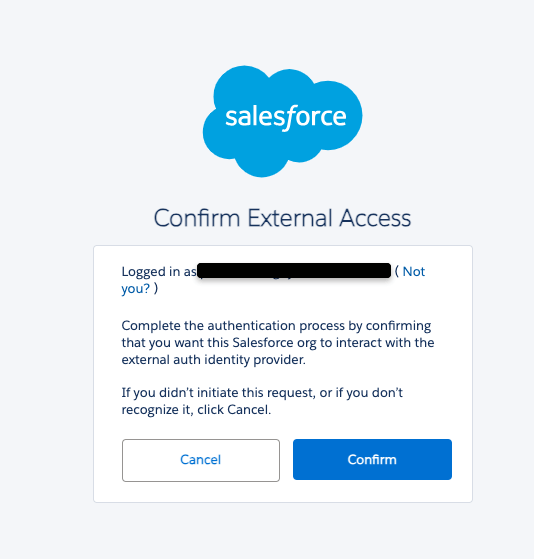
Step 5 : If all has been configured correctly, you should not see this popup from Salesforce
🤓 Final Thoughts
Setting up OAuth is never glamorous, and the Square Sandbox throws in a twist that’s easy to miss. But once you know the trick (open the dashboard!), things click into place.
Hopefully, this saves someone else a few hours of head-scratching and lets you get on with building cool stuff.
Happy integrating! 🛠️✨
